Overview
This Quick Reference Guide (QRG) is intended for Buyers who need to add Vendors to a sourcing project in the eMaryland Marketplace Advantage (eMMA) and send solicitation notifications.
NOTE: You can only add vendors to sourcing projects that you own or for which you are the Procurement Officer (PO).
NOTE: For best results, use the Google Chrome browser to access eMMA.
If you need help at any time, please reach out to the eMMA helpdesk at emma.helpdesk@maryland.gov.
Step-by-Step Instructions
- Access eMMA at https://emma.maryland.gov and log in with your credentials.
NOTE: Depending on your agency, you may only need to click the State SSO Login (Secure Auth) button or the MDOT SSO Login (MSAzure) button and log in with your credentials. - Click the Sourcing tab at the top of the screen and select Browse Sourcing Projects from the drop-down menu that opens. Search fields display above a list of sourcing projects of which you are a member.

- Use the Search fields and filters to find the solicitation. Once you locate the desired solicitation, click the blue hyperlink in the Sourcing Project column to view its details.
REMINDER You can only add vendors to sourcing projects that you own.
- Click the Vendors tab on the left-hand side-panel. Any preselected vendors display on this page.

- Click the Select Vendors button in the Consulted Vendors section. The Browse Vendors pop-up window opens and displays a list of Vendors based on the sourcing project’s main commodity.

- (Optional) If you have a specific Vendor in mind that may not be on the commodity list but can provide the required service, enter their name in the Keywords field and click the Search button.
- Select the checkbox to the left of the Vendor and close the Browse Vendors window. That Vendor displays on the Vendors page.
- Click the ellipsis (three dots) icon to continue to Step 7.
- Click the Commodity field to open a drop-down list and click the See All option at the bottom. This list lets you add more commodities that are relevant to your sourcing project to get a broader selection of vendors. You can add as many commodities as you want in this field.
NOTE: It is a best practice to select as many commodities as possible to obtain a thorough vendor list.
- The Select Commodities window opens with a full list of commodities. Use the plus
 and minus
  icons to the left of the commodity groups to expand and collapse them. Select the checkboxes to the left of the commodity(ies) you want to add and close the window. NOTE: Selecting a commodity level next to a plus icon or minus icon only provides vendors that are registered for that exact commodity, and NOT any sub commodities below that level.
The selected commodities display in the Filters section of the window, below the search fields and above the list of vendors.
- Click the Search button at the top of the Browse Vendors window. A list of Vendors displays relevant to the commodities you selected.

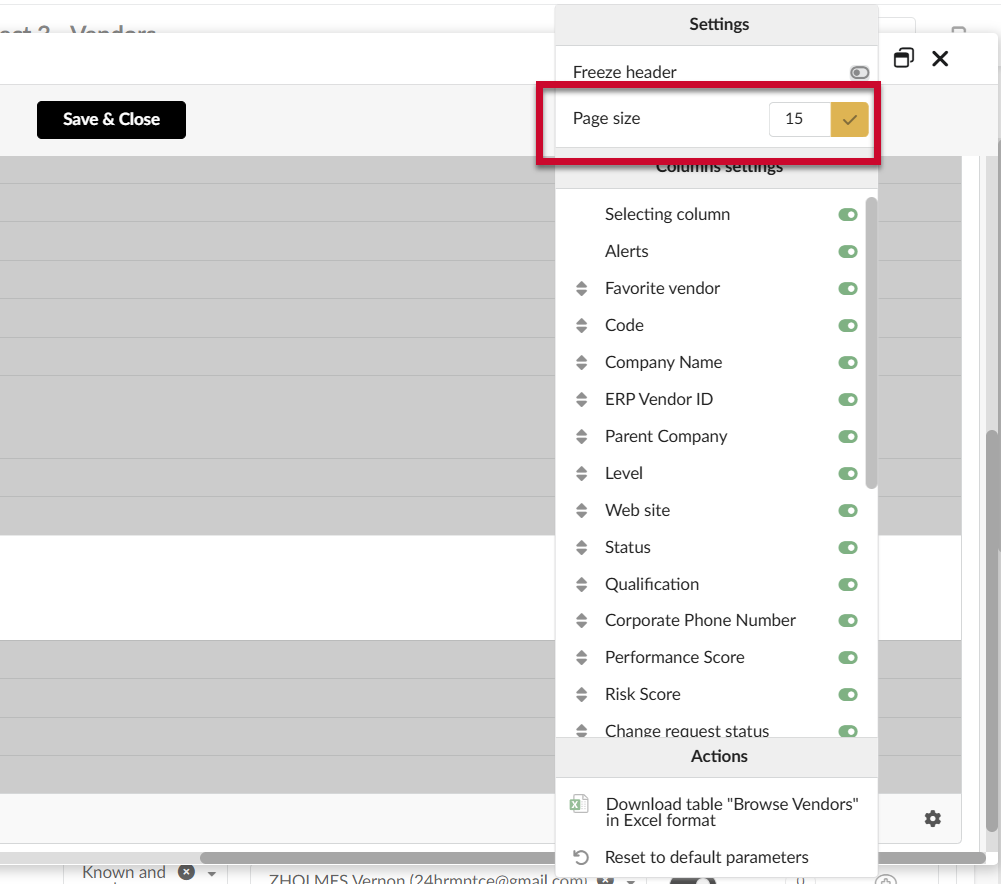
- Scroll to the bottom of the Browse Vendors window and click the Settings (small gear) icon in the lower right-hand corner of the Browse Vendors window. A drop-down menu opens up.
NOTE: You may need to scroll horizontally to see the icon.
- In the Grid page size field enter a number (150 max) to see that many results listed in the Browse Vendors window and click the checkmark to the right of the field.
- Select the topmost checkbox to the left of the column headers to select all vendors on that page in the commodity.

- Scroll down to the bottom of the Vendors list and click the next page in succession. A list of unselected Vendors displays.
NOTE: Skip this step if you don’t see numbers at the bottom of the window.
- Repeat Steps 12 and 13 until the Vendors on all pages are selected.
- Close the Browse Vendors window. The Vendors are listed in the Consulted Vendors section.
- Click the Save button at the top of the page.
IMPORTANT: You must make sure you click the Save button or you will lose your progress to this point.
Next Steps
The next steps for most projects include preparing the sourcing project for publishing. See the Prepare a Solicitation Project, and Notify Vendors of Solicitation and Publish QRGs.