Overview
This QRG is for eMMA users with the ability to create Intake Requests, called “Intake Requesters” in eMMA. Intake Requesters can now initiate intake requests, guided by eMMA's intelligent AI assistant, for both IT and non-IT procurement needs in the eMaryland Marketplace Advantage (eMMA). This allows an intake request to be routed for the appropriate approvals in eMMA, including necessary approvals from the Department of General Services (DGS) and/or the Department of Information Technology (DoIT). eMMA will also connect intake requests to subsequent solicitations when one is created.
This QRG is broken into three sections covering the creation of an intake request, completion of the Requester Upload Fund Certificate step, and how to browse existing intake requests. Use the Table of Contents below to quickly navigate to the section that you need to review.
TABLE OF CONTENTS
- Create an Intake Request in eMMA
- Requester Upload Fund Certificate
- If Your Request is Rejected
- Browse Intake Requests in eMMA
NOTE: Depending on your role in eMMA, your screen may vary slightly from the images shown in this QRG.
NOTE: For best results, use the Google Chrome browser to access eMMA.
If you need help at any time, please reach out to the eMMA helpdesk at emma.helpdesk@maryland.gov.
Step-by-Step Instructions
Create an Intake Request in eMMA
NOTE: This QRG uses diagrams with specific callouts to show required and optional fields in forms. A yellow callout with a red border ![]() indicates a required field, while yellow callouts with a black border
indicates a required field, while yellow callouts with a black border ![]() indicate optional fields. Letters within the callouts correspond to the explanations below the diagram.
indicate optional fields. Letters within the callouts correspond to the explanations below the diagram.
- Access eMMA at https://emma.maryland.gov and log in with your credentials.
NOTE: Depending on your agency, you may only need to click the State SSO Login (Secure Auth) button or the MDOT SSO Login (MSAzure) button and log in with your credentials. - After logging into eMMA, navigate to New Intake Request.

- Indicate what your are looking for by entering or uploading your requirements.
- To manually enter the requirements, select the Enter Requirements radio button and type them in the field labeled Describe your requirement. Then click the Create Intake Request button.

- To upload a requirements document, select the Upload Requirements Document radio button then click the Upload Requirement Document button.

eMMA AI will automatically create the request and assign it a number after requirements provided.
At any point, eMMA AI can be accessed by clicking the eMMA AI icon in the upper right-hand corner.
- To manually enter the requirements, select the Enter Requirements radio button and type them in the field labeled Describe your requirement. Then click the Create Intake Request button.
- Complete the remaining mandatory fields in the Intake Information section.

- Intake Type: The type of procurement request that you require. (auto-populated by eMMA AI).
- Requisition Number: A system-generated number that appears after the request is submitted. Format is Facility+MM/DD/YY+Time(military). Example: PCTC0212261425.
- Request Type (*): This is the category that best describes the goods or services needed (e.g. New Procurement Request - Information Technology). Each option has a summarized description to facilitate selection.
- Intake Work Category: The category that the intake request falls under (e.g. CSE: Commodities, Supplies, Equipment).
- Title (*): Defaults as blank and should contain information specific to your procurement.
- Intake Description (*): Write a short description of the nature of your intake request.
- Requester Name: Defaults to your name (not editable).
- Agency (*): Your primary agency (auto-populated by eMMA AI).
- Subagency/Department (*): Your specific subagency, department, or subdivision that the procurement need. is for
- Review and complete the information in the Request Details section as appropriate.

- Estimated Budget for Base Term of Contract(*): Enter the total estimated dollar amount for the initial term of the contract.
- First Fiscal Year of Base Term(*): The first fiscal year of the contract term.
- Expected Contract Base Term: The anticipated duration of the contract in years.
- Requisition Documentation: Use the Click or Drag to add files button to upload and attach any supporting documentation to the request. (e.g., spec sheets, blueprints, etc.).
- Approval Document: Use the Click or Drag to add files button to upload any attachments that document previously obtained approvals for this intake request. Note that this field becomes mandatory if the Department Approval in eMMA? field below is set to "No, just upload offline approval document".
- Complete the Request Reviewers section.

- Department Approval in eMMA?(*): Indicates whether the Department Head Approval will occur in eMMA or outside of the system. If yes, then a user must be selected. If no, then the Requester must upload an approval document.
- Department Head Approval(*): Lists the eMMA user that will provide the approval at this step. (Note: This field will only be mandatory if the Department Head Approval in eMMA field above is set to 'Yes').
- Agency Procurement Officer: Lists the eMMA user that will provide the approval at this step. Leave this field blank.
- DGS OSP Procurement Officer: Lists the eMMA user that will provide the approval at this step. Leave this field blank.
- Additional Category Approver: Lists the eMMA user that will provide the approval at this step. Leave this field blank.
- Click Save.

- Click Submit Intake.

Requester Upload Fund Certificate
During the Intake Request approval process, it will be reviewed by the Financial Approver. After the Financial Approver approves your Intake Request, it may be routed back to you at the Requester Upload Fund Certificate step of the workflow. At this time you will receive an email notification, and the task will appear on your homepage in the My Pending Validations section. Note that this will not be required if the Financial Approver uploads the Fund Certificate on your behalf. Follow the steps below to advance your Intake Request.
NOTE: You will receive a workflow activity at the Requester Upload Fund Certificate step regardless of whether or not you previously attached the fund certificate.
- From the homepage, you can access the intake request with the activity of Requester Upload Fund Certificate directly from the My Pending Validations section. Click on the Object hyperlink to open your intake request

NOTE: You can also open your Intake Request directly from the email notification you receive by following the included link.
NOTE 2: If you uploaded the Fund Certificate when creating the intake request, proceed directly to Step 4.
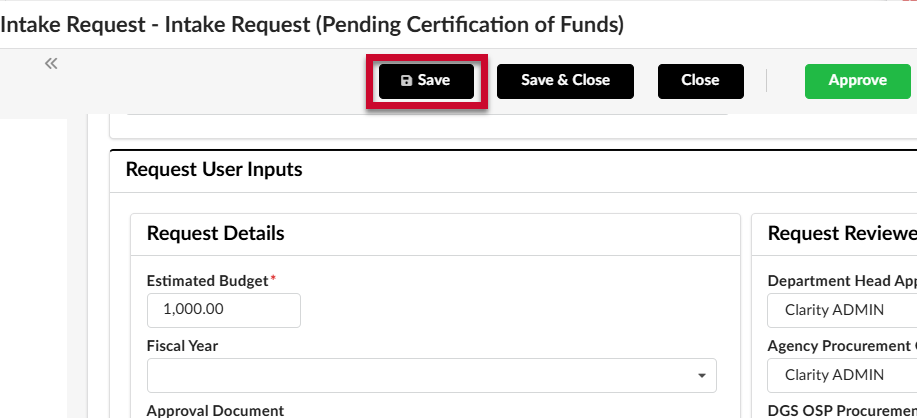
- Scroll down to the Request Details section. In the Certification of Funds field, use the Click or Drag to add a file button to select the fund certification document from your desktop and upload it.

- Click Save.
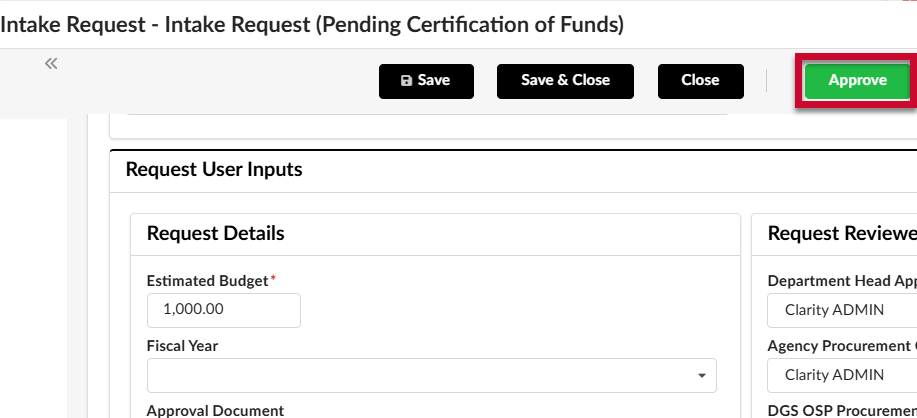
- Click Approve.
If Your Request is Rejected
In some cases, a reviewer might choose to reject your intake request back to you rather than advance it to the next step in the workflow. (e.g., if you were missing an attached document required by your agency) In this scenario, you will receive an email notification informing of you of the rejection with a link to the intake request in eMMA. To view the comments:
- Navigate to the intake request from either the link in your email or using the instructions for the Browse Intake Requests section of this QRG.
- Click to expand the Workflow follow-up panel in the right-hand navigation bar.

- The Workflow follow-up panel is displayed. Locate the step with a red X next to it and click on the comment icon to expand the comment and read the approver's reason for rejecting the intake request.

- Update and resubmit the intake request as appropriate based on the approver's instructions.
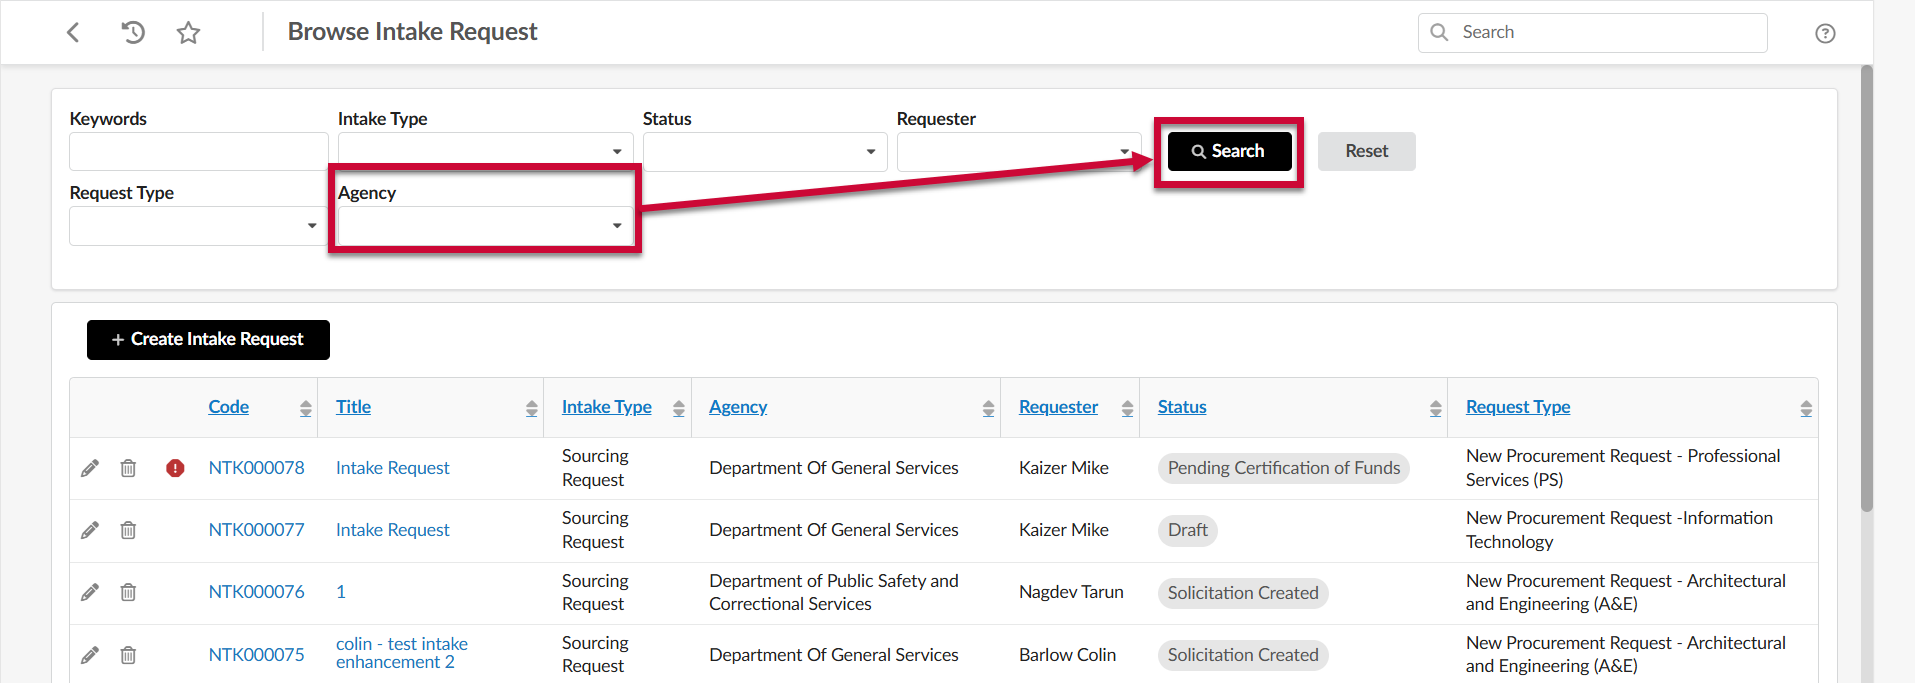
Browse Intake Requests in eMMA
This section shows how to access the Browse Intake Requests page in eMMA and search for requests using the available filters. This page lets you search through existing Intake Requests.
- Access eMMA at https://emma.maryland.gov and log in with your credentials.
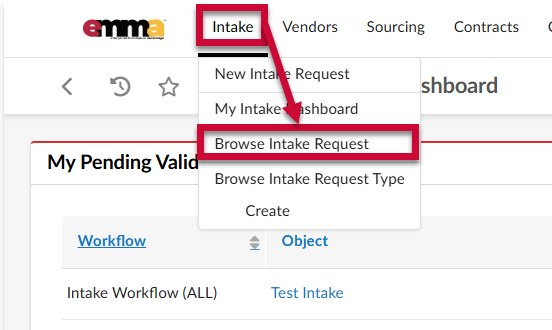
NOTE: Depending on your agency, you may only need to click the State SSO Login (Secure Auth) button or the MDOT SSO Login (MSAzure) button and log in with your credentials. - Click the Intake tab at the top of the web page to open the drop-down menu and select the Browse Intake Requests option. This shows a list of Intake Requests, both approved, and in progress.
- From here you can click the Edit (pencil) icon to the left of your Intake Request to view and edit project specifications.

Browse Intake Requests Using the Keyword Filter
The Keyword field displays Intake Requests based on a keyword or term you enter. The best way to find an Intake Request is to have the NTK number handy and enter it in the Keywords field.
The NTK number is listed under the Code column on the Browse page. You can also find it on your Intake Request.
- Click the Keyword field and enter a term to narrow the list of Intake Requests.
- Click the Search button to display results.

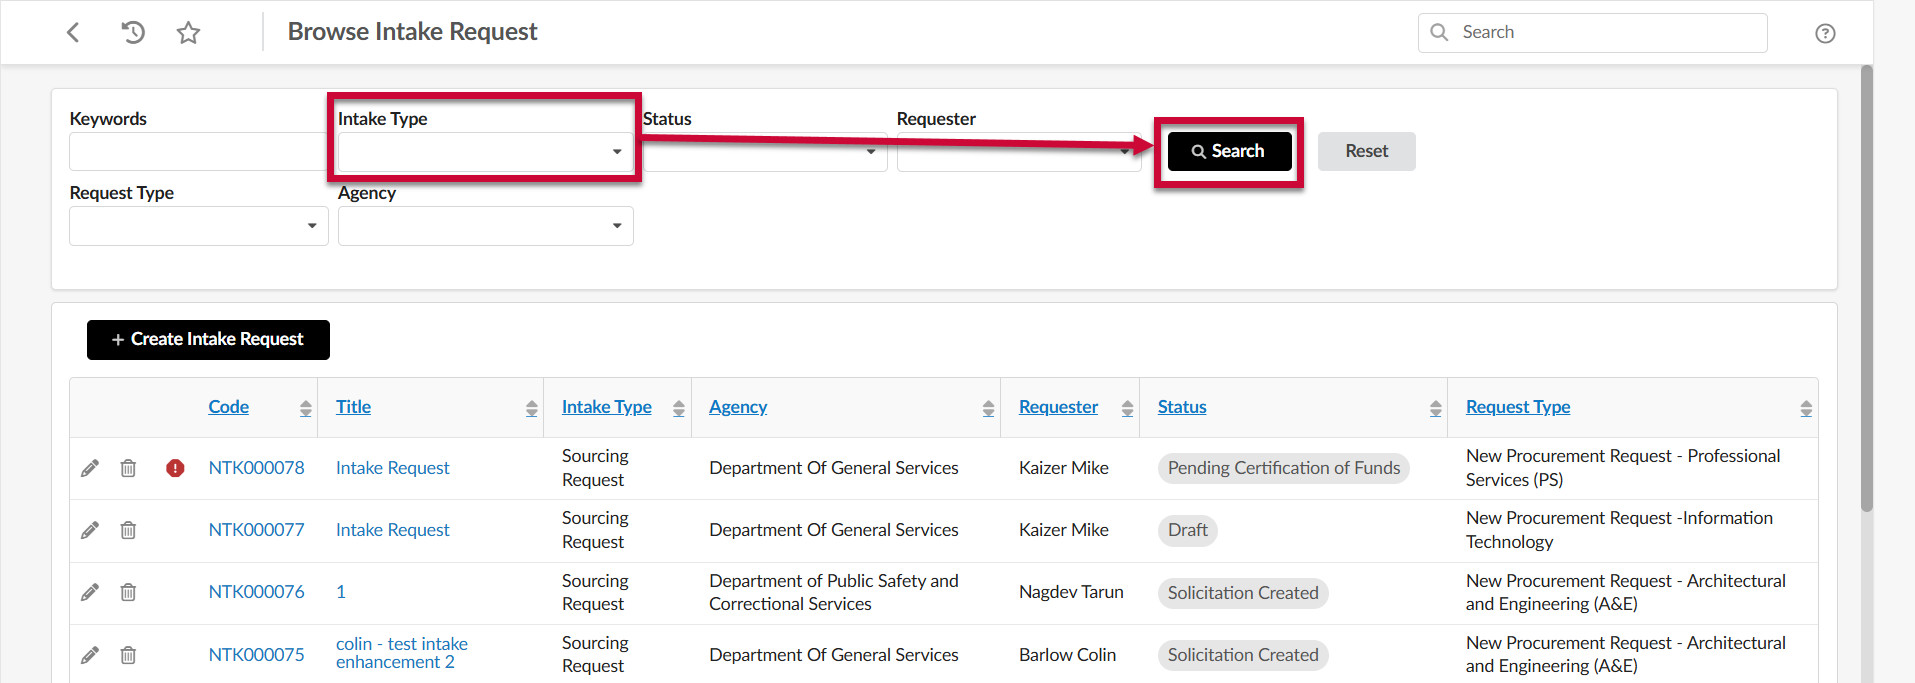
Browse Intake Requests Using the Intake Type Filter
The Intake Type field displays Intake Requests based on whether they are Sourcing or PRG Intake Requests.
NOTE: Not all users have access to the Intake Type filter.
- Click the Intake Type field to open the drop-down menu and select the option you wish to view.
- Click the Search button to display results.
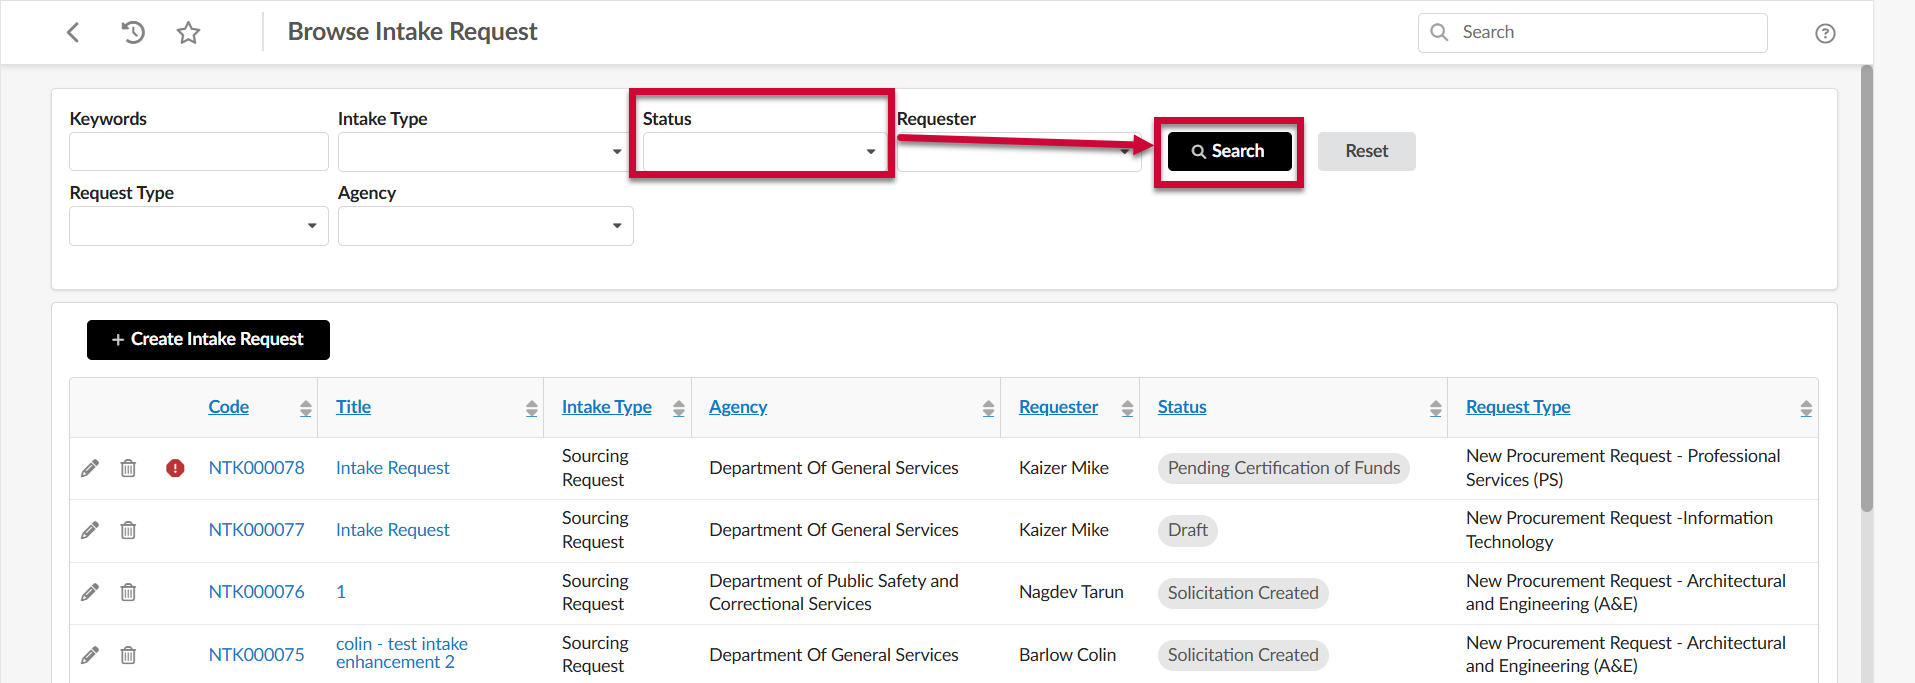
Browse Intake Requests Using the Status Filter
The Status field displays Intake Requests based on their current status in the Intake Approval Workflow.
- Click the Status field to open the drop-down menu and select the option you wish to view.
- Click the Search button to display results.
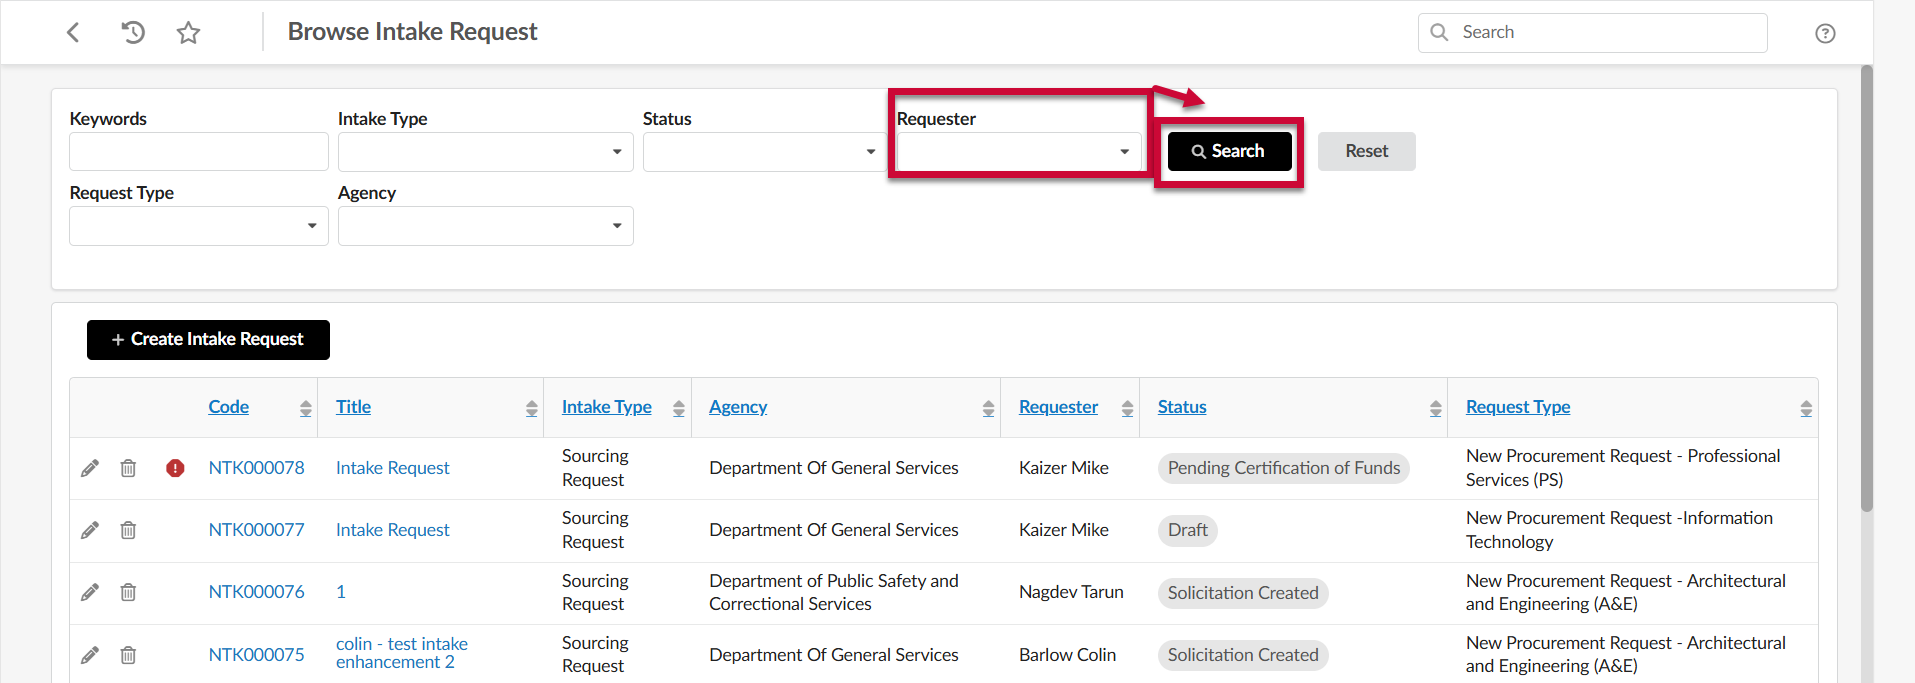
Browse Intake Requests Using the Requester Filter
The Requester filter displays Intake Requests based on the user who initiated the request.
NOTE: Not all users have access to the Requester filter.
- Click the Requester field to open the drop-down menu and select the option you wish to view.
- Click the Search button to display results.
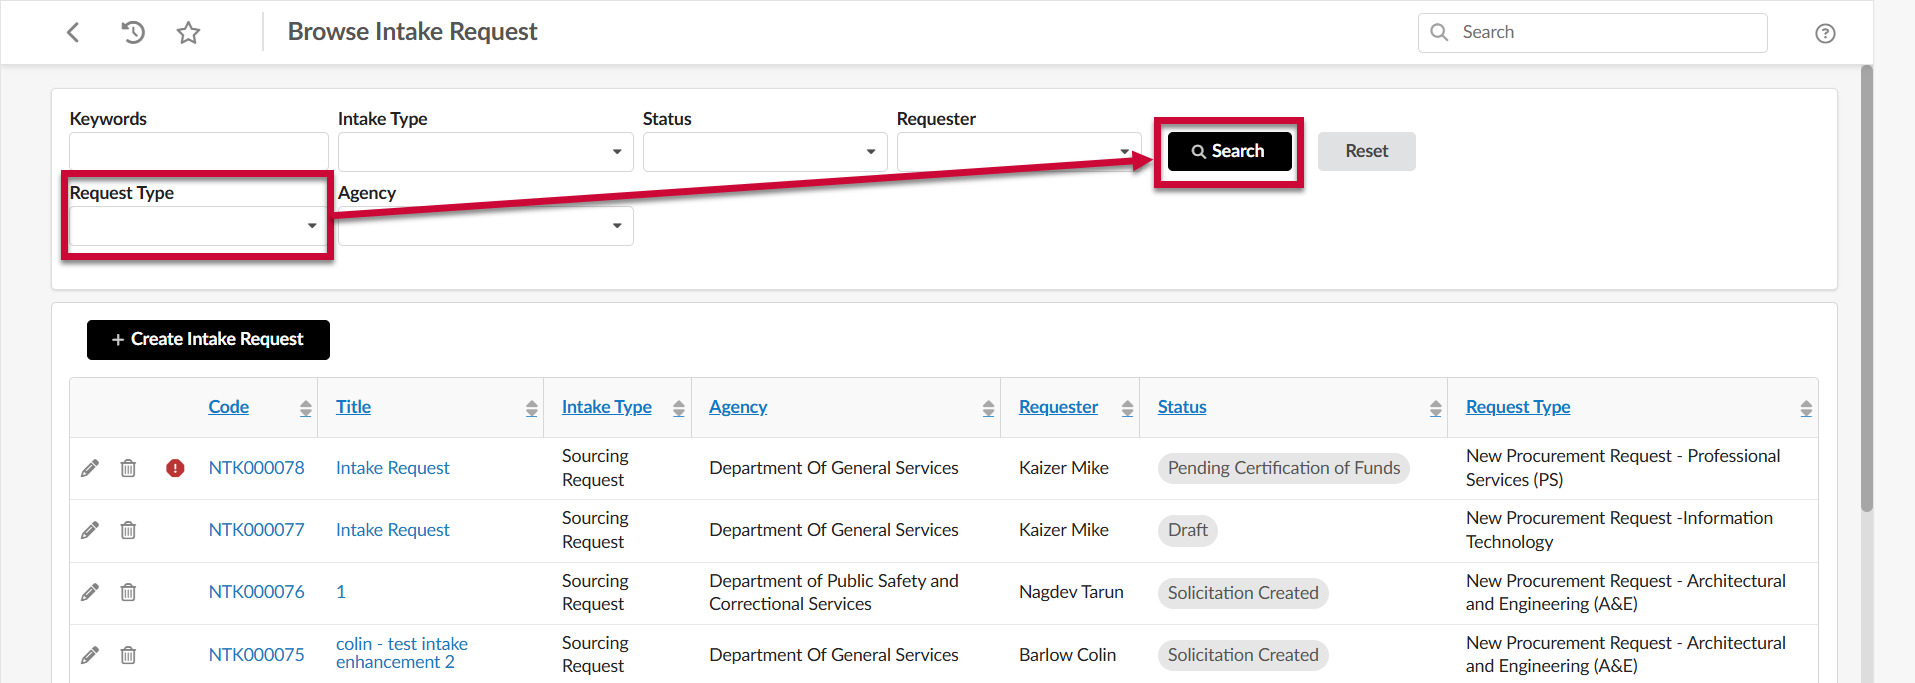
Browse Intake Requests Using the Request Type Filter
The Request Type filter displays Intake Requests based on the Request Type selected when creating the request.
- Click the Request Type field to open the drop-down menu and select the option you wish to view.
- Click the Search button to display results.
Browse Intake Requests Using the Agency Filter
The Agency filter displays Intake Requests based on the Agency that submitted the request.
NOTE: Not all users have access to the Agency filter.
- Click the Agency field to open the drop-down menu and select the option you wish to view.
- Click the Search button to display results.