Overview
Active Vendors cannot change their Vendor Profile name in eMMA. This falls capability to the Vendor Coordinator for initiation and the Comptroller’s office for approval. This Quick Reference Guide (QRG) shows a user with the Vendor Coordinator role how to initiate a name-change Change Request in eMMA.
NOTE: For best results, use the Google Chrome browser to access eMMA.
If you need help at any time, please reach out to the eMMA helpdesk at emma.helpdesk@maryland.gov.
Prerequisites
You will need the following completed and scanned documents:
- Tax document (W9, W8, or Photo ID depending on business type)
- Either an Invoice or an IRS 147-C form
NOTE: These documents must reflect the updated name change.
Step-by-Step Instructions
Create a Change Request for a Vendor Name Change
- Access eMMA at https://emma.maryland.gov and log in with your credentials.
NOTE: Depending on your agency, you may only need to click the State SSO Login (Secure Auth) button or the MDOT SSO Login (MSAzure) button and log in with your credentials.
- Click the Vendors tab at the top of the webpage and click the Browse Vendors option from the drop-down list that opens.

- Use the search fields and Search button to locate the Vendor requiring the change request.

- Click the Edit (pencil) icon on the left side of the Vendor to access the Vendor profile.

- Click the Create a Change Request button at the top of the webpage.

- Enter information regarding the name change in the Change Request Comments field.
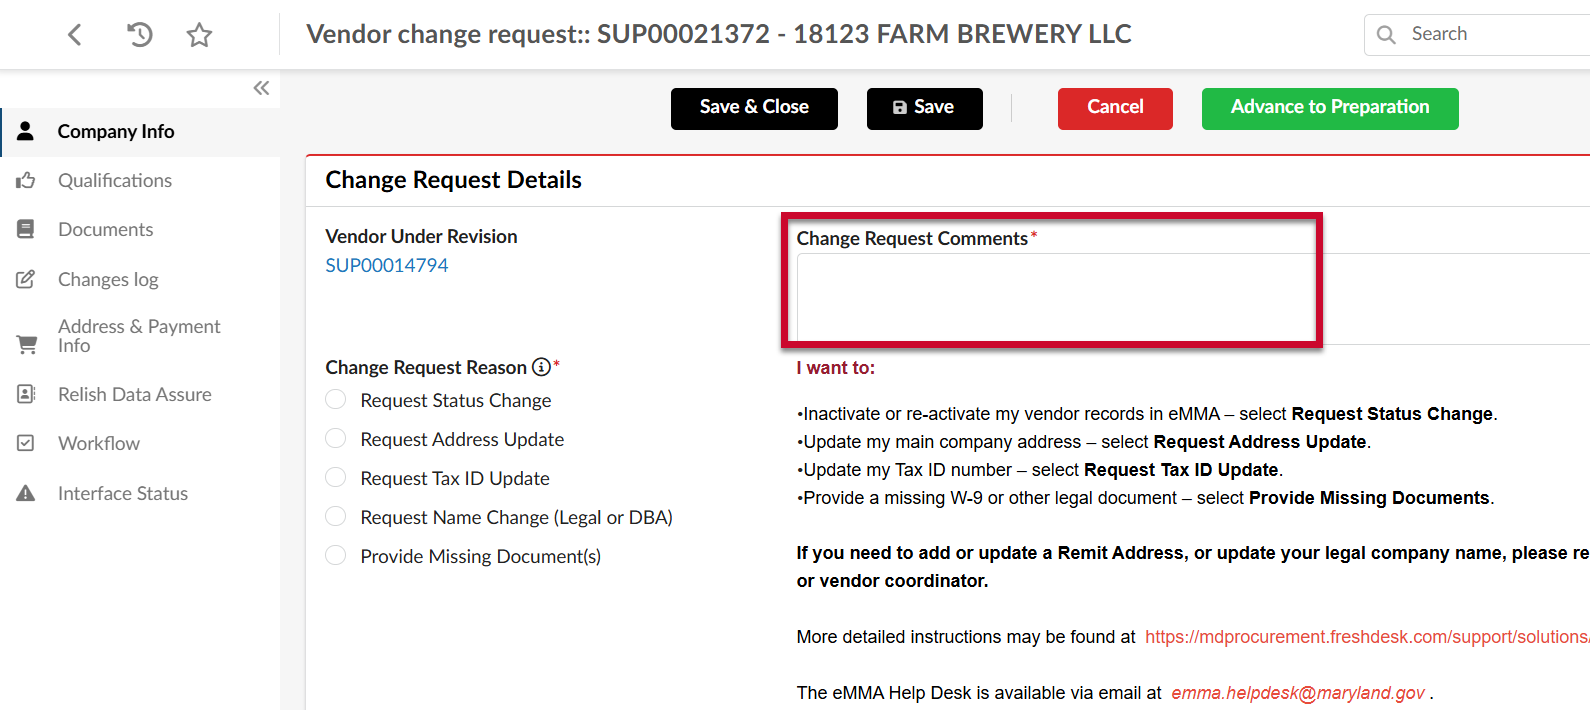
- Select the checkbox for Request Name Change (Legal or DBA) in the Change Request Reason list.

- Click the Supplemental Evidence Document field and select the appropriate option from the drop-down list that opens. A red asterisk (*) indicates a required field.

- Click the Advance to Preparation button at the top of the webpage. Click OK in the prompt that displays.

- Scroll down to the Company Information section and enter the new name in the Legal Name and Company Name (DBA) fields. A red asterisk (*) indicates a required field.
NOTE: If there is no DBA name, re-enter the Legal Name in the Company Name (DBA) field.
- Click the Documents tab on the left-hand side-panel.
NOTE: From this point on, your screen may vary from what’s shown in this QRG, depending on which Supplemental Evidence Document you selected in Step 8.
The interface shows two required documents in pink lines.
- Click the Add (plus) icon to the left of the document you wish to upload. A new window opens.

- Click the Click or Drag to add files button to upload the document.
NOTE: You cannot upload documents larger than 307,200 KB.
NOTE: Your tax document must reflect the new name change.
- (Optional) Change the Date Provided and Owner fields, if necessary. These fields populate with today’s date, and your profile name, respectively.

- Click the Save button at the top of the Edit document window.

- Click the Submit W-9 for Review button at the top of the Edit document window.

- Click the Save & Close button at the top of the Edit document window. The document refreshes on the Documents page.

- Repeat Steps 12-17 for the next required document.
NOTE: If you are uploading an invoice as evidence, the invoice must reflect the new name change.
NOTE: If you are uploading an invoice as evidence, DO NOT submit an invoice for payment here.
- Click the Submit for Approval button at the top of the webpage. Click OK in the prompt that displays.

Relish will check the content for a tax ID match against the IRS database. The name change will take effect after the final approval.